
1. Why You Need a Custom Skin in 2026
There are around 170 million active Minecraft players. The default skins — Steve and Alex — look exactly the same on all of them. On any public server, a quarter of the players you see are wearing one of those two skins, which tells you nothing about them and blends them completely into the background. A custom skin costs nothing and takes less than an hour, but it makes every screenshot, every server interaction, and every YouTube recording immediately recognizable as yours.
The older way of making skins involved downloading Photoshop or GIMP, finding and studying a flattened UV template, and guessing which unlabeled square mapped to which part of the character model. You'd export it, upload it, load the game, and discover the arm pixels were all backwards. Browser-based 3D editors made that whole process obsolete. You paint directly on the model, rotate it in real time, and see exactly what you're building before you save anything.
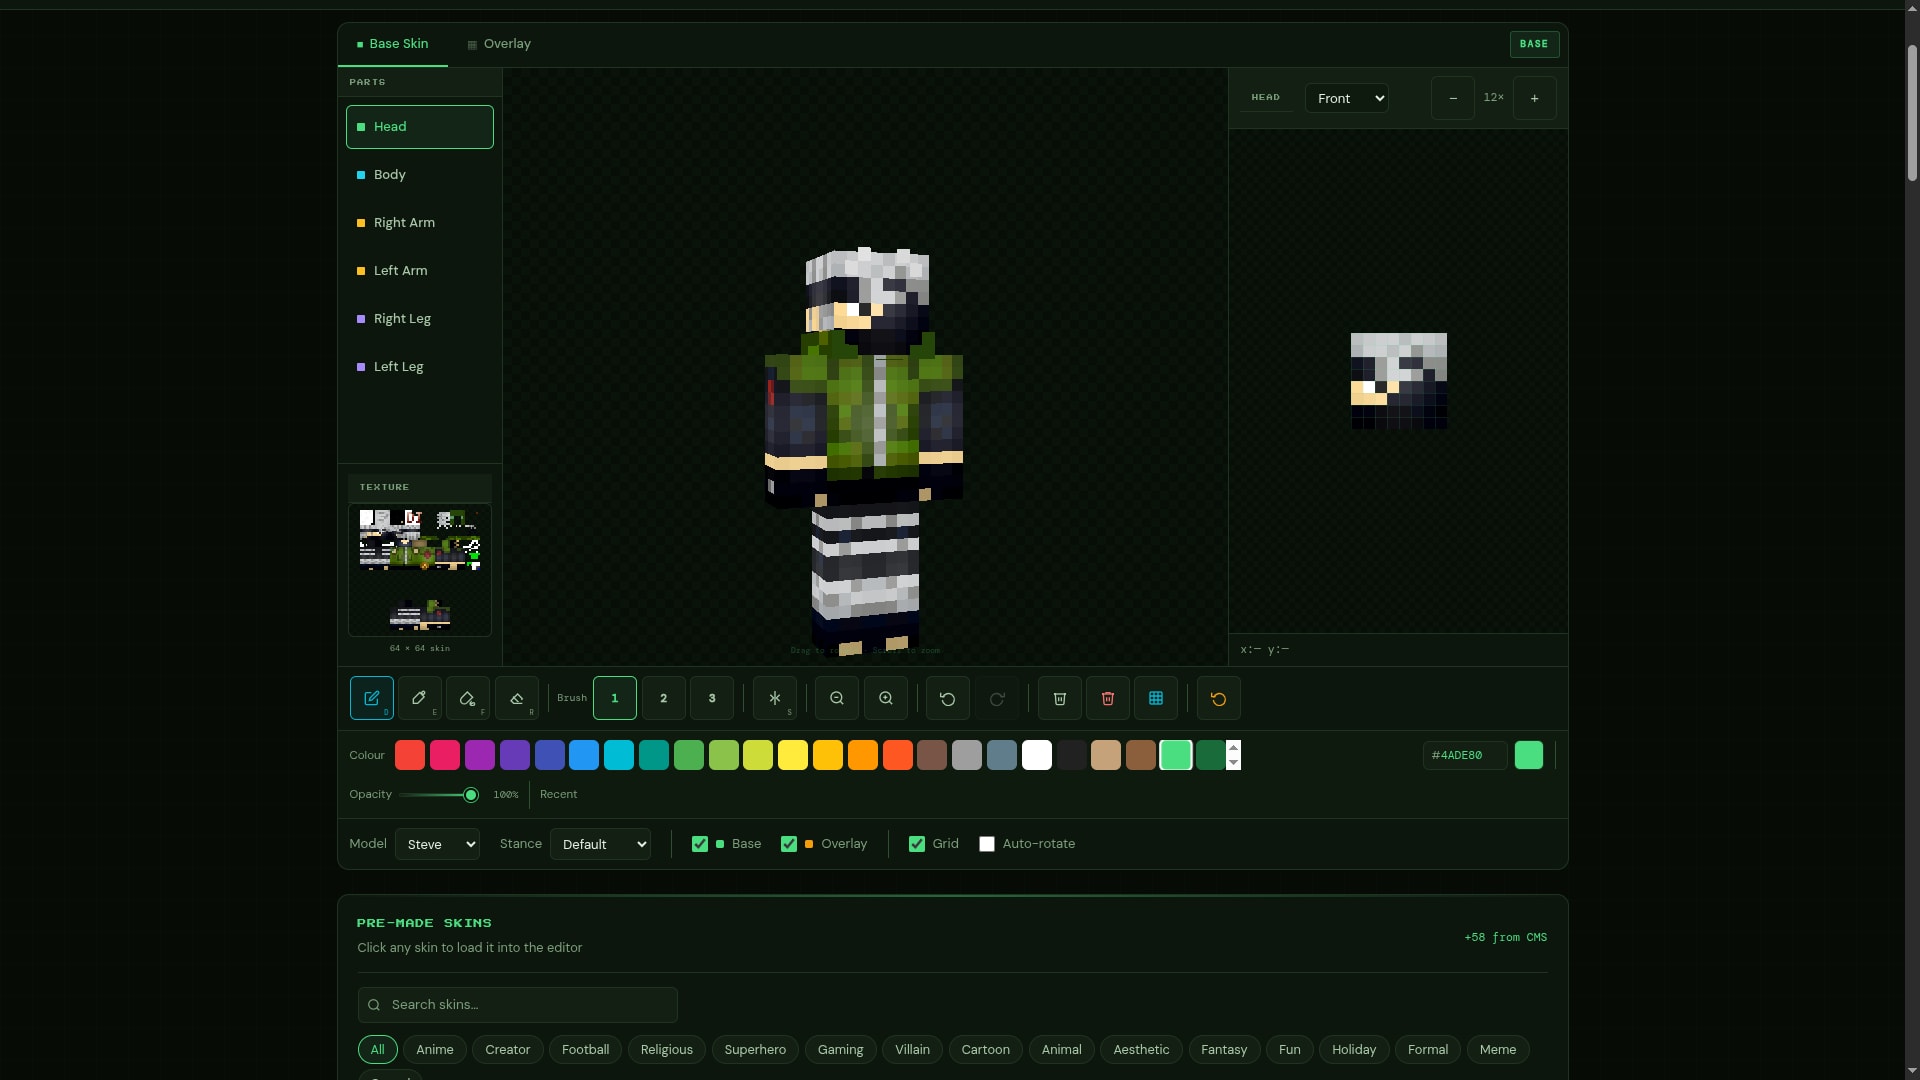
Try it now: Don't want to read the guide? You can jump straight in and start painting on a live 3D model using the Minesite Skin Editor right now. It's 100% free, requires no downloads, and works on desktop and tablet browsers.
2. Steve vs. Alex: Choosing Your Model
Before you place a single pixel, you must choose your base model. Minecraft skins come in two distinct formats, commonly referred to as "Steve" (Classic) and "Alex" (Slim). The difference between the two lies entirely in the arms.
The arms on the Steve model are 4 pixels wide. This gives the character a bulkier, more square appearance. It is ideal for knights, robots, monsters, or heavily armored characters.
The arms on the Alex model are 3 pixels wide. This provides a slimmer, more proportionate look. It is highly popular for modern human outfits, anime characters, and sleek designs.
It is crucial to select the correct model before you start designing. If you design a skin on the Steve template but upload it to Minecraft using the Alex setting, the texture will map incorrectly, resulting in a glitchy, black bar appearing on the side of your character's arms. In the Minesite Skin Editor, you can toggle between the 4px and 3px arm models at any time to see how your design fits.
3. Mastering the Dual-Layer System
Modern Minecraft skins are composed of two separate layers: the Base Layer (the skin/body) and the Outer Layer (the clothing/accessories). Understanding how to utilize both layers is the secret to creating professional-tier designs with realistic depth.
The Base Layer
The base layer should represent the physical body of your character. This is where you paint the skin tone, the face, the eyes, and perhaps a simple undershirt or base layer of clothing. Everything on the base layer sits perfectly flush with the character's hitbox.
The Outer Layer (Overlay)
The outer layer sits exactly one pixel away from the base layer, creating a 3D effect. In 2026, professional skin designers use the outer layer extensively. You should use the outer layer for:
- Hair: Adding hair to the outer layer gives your character's head volume and texture, preventing them from looking bald or flat.
- Jackets and Hoodies: A jacket painted on the outer layer will visibly sit over the top of the undershirt on the base layer.
- Accessories: Glasses, headphones, belts, backpacks, and armor plating should always be placed on the outer layer to give them a physical presence.
In the Minesite editor, you can independently toggle the visibility of the Base and Outer layers. When painting the torso on the Base layer, toggle the Outer layer off so it doesn't block your view!
4. Color Theory and Shading Techniques
The tell-tale sign of a first skin is uniform, unshaded colour blocks — a single flat red for the entire torso, one grey for each sleeve. It reads as unfinished because real fabric and skin catch light differently on each face of the model. Shading is what makes the difference between a skin that looks like a painted box and one that looks like an actual character.
Hue Shifting
When you want to shade a color to make it darker (for example, adding shadows under the arms or at the bottom of the torso), do not simply lower the brightness. Instead, use a technique called Hue Shifting.
If you are shading a red shirt, shift the hue slightly toward purple (blue) on the color wheel while simultaneously lowering the brightness. When highlighting the same red shirt, shift the hue slightly toward yellow/orange while increasing the brightness. This mimics how natural light behaves and makes your skin look vibrant and alive.
Noise and Texture
Perfectly smooth surfaces look like plastic. To give a shirt the appearance of fabric, or to give hair the appearance of strands, you need to add texture. This is done by scattering pixels of slightly lighter and darker shades across the surface. Many modern editors include a "noise" or "scatter" brush specifically for this purpose, allowing you to quickly add texture to a flat area of color.
5. Popular Skin Styles in 2026
Trying to design a skin from a blank canvas is harder than it sounds. Starting from a recognized aesthetic — something with a clear set of colours, clothing types, and shading conventions — gives you a framework to work within and then deviate from. Here are the styles that show up most consistently on large servers right now.
The E-Boy / E-Girl Aesthetic
Characterized by oversized hoodies (utilizing the outer layer extensively), split-dyed hair, chains, and monochrome color palettes with single bright neon accents. These skins often use the Alex (Slim) model.
The Medieval / Fantasy RPG
This style works well on survival multiplayer (SMP) servers. These skins feature heavy use of leather browns, iron grays, and muted earth tones. The Steve model is often used to give armor plating a bulkier look. Belts, pouches, and shoulder pads are heavily detailed on the outer layer.
Mobs in Suits
A classic that never dies. Take a standard Minecraft mob—a Creeper, an Enderman, a Slime, or a Frog—and paint a highly detailed, sharp tuxedo or business suit over them. It's funny, recognizable, and surprisingly elegant.
Need a world to match your skin? If you designed a snowy viking character, you don't want to spawn in a desert! Check out our Best Seeds list to find the perfect Snowy Taiga or Ice Spikes biome to start your new adventure.
6. Exporting and Uploading
Once your masterpiece is complete, it's time to get it into the game.
Click the download button in the editor. Your skin will export as a 64x64 pixel PNG file. The image will look like a strange, flattened layout of body parts—this is normal. Do not resize or edit this image in another program, as changing the dimensions will break it.
Open the official Minecraft Launcher. Navigate to the "Skins" tab at the top. Click "New Skin," name your skin, select your model type (Classic/Slim), and browse for your downloaded PNG file. Click "Save & Use."
Launch Minecraft Bedrock Edition. Click "Dressing Room" on the main menu. Click the hanger icon (Classic Skins), select a blank skin slot, and click "Choose New Skin." Browse your device for the PNG file, select the correct arm model, and you're done!
7. A Note on Bedrock HD Skins
Java Edition enforces a strict 64x64 pixel resolution limit for all player skins. However, Bedrock Edition supports High Definition (HD) skins, which can be 128x128 pixels. This allows for incredibly intricate, high-resolution details.
While the Minesite Skin Editor currently focuses on the universal 64x64 standard (ensuring your skin works on both platforms without issue), players exclusively on Bedrock can utilize external HD editors. However, be aware that if you play on cross-platform servers (like GeyserMC servers), Java players will not be able to see your HD skin properly, and the server will likely downgrade your appearance to a default Steve.
8. Troubleshooting Common Skin Glitches
Sometimes things don't go according to plan. Here are the most common skin errors and how to fix them.
You designed your skin using the Alex (3px) template but uploaded it using the Steve (4px) setting. Go back to the launcher and change the model type to Slim.
You likely painted your entire head on the Outer Layer and left the Base Layer completely transparent. While Minecraft supports transparency on the outer layer, the base layer must be solid. Go back to the editor and move your face to the base layer.
If you opened the 64x64 PNG in MS Paint or another program to look at it, you might have accidentally saved it with a different color profile or dimension. Re-download the original file directly from the editor.
8.5 Where to Find Inspiration
Staring at a blank 64x64 canvas can be intimidating, even for experienced artists. If you are struggling to come up with a design, the best approach is to draw inspiration from existing media, community trends, and even real-world fashion.
Pop Culture and Anime
Many of the most popular skins on major servers are direct recreations of characters from popular anime, movies, and video games. Recreating a known character is a fantastic way to practice your pixel art skills because the design decisions (color palette, clothing style, hair shape) have already been made for you. Your job is simply to translate those decisions into a low-resolution pixel format. Characters with distinct, bright color palettes (like Naruto or Goku) translate exceptionally well into Minecraft.
Real-World Streetwear
If you prefer a more modern, grounded look, look at real-world streetwear brands. Oversized sneakers, graphic tees, chain necklaces, and complex jacket designs are incredibly popular in the Minecraft community. You can literally pull up a picture of a real-life outfit on one side of your screen and the Minesite Skin Editor on the other, using the eye-dropper tool to perfectly match the real-world colors to your digital avatar.
The "Frankenstein" Method
A very common technique for beginners is to combine elements from several different skins they like. For example, you might download a skin because you love how the creator shaded the hair, and another skin because you love the jacket design. While you should never steal someone else's work and pass it off as your own, studying how other artists achieved specific effects—and then applying those techniques to your own original design—is one of the fastest ways to improve. You can analyze how they used the Outer Layer to give the jacket volume, or how they used hue shifting to make the hair look shiny.
9. Frequently Asked Questions
Can I use a custom skin on console versions of Bedrock?
Unfortunately, no. The Xbox, PlayStation, and Nintendo Switch versions of Minecraft Bedrock Edition do not allow you to upload custom PNG files from your device for security reasons. You are restricted to using the built-in character creator or purchasing skin packs from the Marketplace. Custom PNG uploads are only available on Windows 10/11 and Mobile (iOS/Android) versions of Bedrock, as well as all versions of Java Edition.
Can I make parts of my base layer transparent?
No. Minecraft does not allow transparency on the base layer of a skin. If you erase parts of the base layer (for example, trying to make a ghost with no legs), the game will automatically fill those transparent pixels with solid black when you load into a world. Transparency is only supported on the Outer Layer (the overlay).
How do I copy a skin someone else is wearing?
If you see a player on a server and you want their skin, you can use online skin-stealer tools. You simply type in their exact Minecraft username, and the database will pull the PNG file currently associated with their UUID. However, it is generally considered better etiquette to use these files as inspiration or templates rather than directly copying a personalized design.
Are capes part of the skin file?
No. Capes are completely separate entities from your 64x64 skin PNG. Capes are account-bound items granted by Mojang for attending events (like Minecon), migrating accounts, or purchasing specific editions. You cannot add a cape to your character simply by drawing it on your skin file.
Why does my skin look blurry in-game?
If your skin looks blurry, check your graphics settings. If you have "Mipmap Levels" turned all the way up, it can sometimes cause skins and textures to blur at a distance. Setting Mipmap levels to 0 will result in sharp, crisp pixels at all distances.
READY TO DESIGN?
Launch the Minesite Skin Editor now. It's completely free, runs in your browser, and requires no account. When you're done, jump into your favorite world or use our Seed Map Planner to find a brand new seed to explore with your new look.